How to Use the WordPress Security Plugin

Introduction

At Sucuri, we believe in making the internet safe for everyone. One way we show this dedication is by maintaining a free security plugin for WordPress.

In this guide, we will explain how our WordPress security plugin works – from installation and features, to what you can expect from our free monitoring and security plugin.

Using the Sucuri WordPress plugin does not require a paid Sucuri subscription.

Step 1

Installation & Activation

The WordPress security plugin is free to all WordPress users. It is a security suite meant to complement your existing security posture, offering its users a set of security features for their website:

  • Security Activity Auditing: Tracks and logs all activities on your site to help identify potential security threats.
  • File Integrity Monitoring: Alerts you to any unauthorized changes made to your site’s files.
  • Remote Malware Scanning: Scans your site remotely for malware, ensuring it’s clean and secure. Powered by our SiteCheck remote website scanner.
  • Blocklist Monitoring: Checks if your site has been blocklisted by search engines due to malicious content, SEO spam, or other serious issues.
  • Security Hardening: Implements preventive measures to help harden WordPress against attacks.
  • Post-Hack Security: Features that help you address a hack and take immediate action to prevent further damage to your site, including resetting security keys, user passwords, and managing installed plugins.
  • Security Notifications: Keeps you informed of any suspicious activities or security breaches via customizable email alerts.
  • Website Firewall (Premium version only): Integrates with the Sucuri’s website firewall to help protect your site from bad bots, DDoS, and sophisticated attacks.

For full-spectrum malware and DDoS protection, we recommend installing a website firewall.  A complete security plan should also include backups, server-side detection, and emergency response.


Get Protected

Looking for enhanced website security? We’ve got you covered with our monitoring and web application firewall.

1.1 Install the WordPress Security Plugin

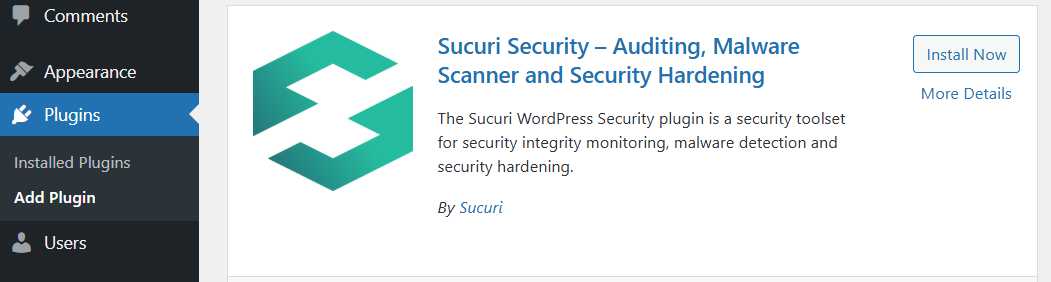
The Sucuri security plugin is in the official WordPress.org plugin repository.  It can be installed and activated by a WordPress user with administrative privileges.  Keep in mind that you will require WordPress version 3.6 and up.

To install the WordPress security plugin:

  1. From the WordPress dashboard go to the repository Plugins > Add Plugin on the left side of the dashboard.
  2. Type Sucuri in the repository Search Plugins query box in the upper right.
  3. After the search results are displayed, you will see the Sucuri logo and the title:  Sucuri Security – Auditing, Malware Scanner and Security Hardening.
  4. Click the Install Now button.
  5. After installation is complete, click the Activate link. This will take you to the Installed Plugins page.

Once completed, you can access all features by clicking on the Sucuri Security option on the left-side menu of your WordPress dashboard.

WordPress Plugin Repository Search Results

1.2 Generate API

Activating the API allows your WordPress account to connect to our server. If an attacker somehow compromises your site and removes the plugin’s audit logs from your server, they can be recovered from our server for investigation.

To generate the API key for the Sucuri plugin:

  1. Log into your WordPress website as an administrator and open the Sucuri plugin.
  2. Click Generate API Key to the upper right side of your screen.
  3. Check the Terms of Service and Privacy Policy boxes once you have read them.
  4. Click Submit. An email confirmation will be sent to the primary email address with confirmation.

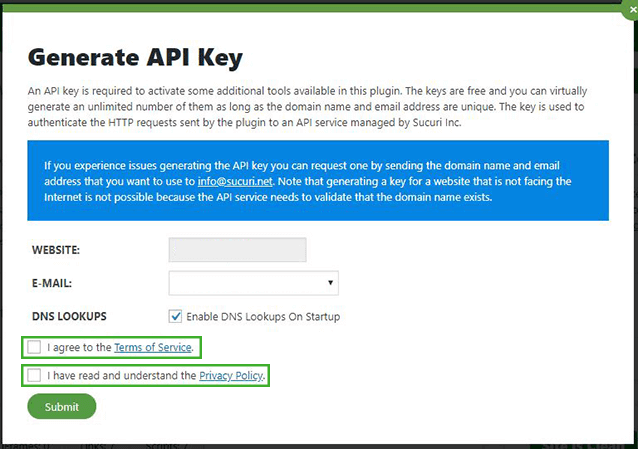
Sucuri Plugin Generate API Key Popup

Note

The keys are free. The key is used to authenticate the HTTP requests sent by the plugin to an API service managed by Sucuri Inc.

1.3 API Service Communication

Once the API key is generated, the plugin will communicate with a remote API service that will act as a safe data storage for the audit logs generated when the website triggers certain events that the plugin monitors. If the website is hacked, the attacker will not have access to these logs. Now you can investigate any modifications (for malware infection) and/or how the malicious person gained access to the website.

1.4 Multisite & Subdomains

This section is relevant if you use a WordPress Multisite installation. However, if you have a single site in your WordPress install, skip to the next section.

The plugin uses the administrator email and the domain name of the site in order to generate an API key (this also applies for subdomains). The information communicated through the API interface will be transferred using this key.

A high percentage of the data processed by the API interface is dependent on the WordPress core files, along with the information stored in the uploads folder. That is why a unique installation of the plugin (in the main site) will not work 100% for subdomains installed in different locations.

For the multisite installations, this is different. A WordPress MU installation will force each site to share the core files. Generally the content is inside the “wp-content” directory (where the plugin’s data is stored). All information processed by the plugin, except the settings, will be shared among every site inside the network.

Subdomains with Unique Installation

This is when multiple subdomains are created and there is a unique installation of WordPress per site. In cases like this, each subdomain has its own database so you will need to install the plugin separately for each subdomain. Each subdomain will not be affected by the API key, audit logs, hardening, or any settings applied to the other subdomains.

Subdomains with MultiSite

This is when you have a network-based installation associated with a unique installation of WordPress. This means there is only one database with multiple “options” tables. In this case, when you install the plugin, the audit logs, hardening, and login information will be shared among all the sites inside the network. The settings, however, will affect only the site where they were applied.

In short, you install the plugin one time for a network-based installation (aka. WordPress MultiSite), otherwise, install the plugin for each

STEP 2

WordPress Hardening & Prevention

Security hardening options are preventative measures to increase security in areas of your website that could become avenues for attack.  This is done by adding a set of rules in your .htaccess file and verifying secure configurations.

Sucuri helps you take steps to fortify your website from outside threats.  You can enable each feature with the click of a button.

Note

The instructions will vary depending on your server software and system. Some systems do not support Certbot, but you can find a list of other reputable clients that should work with your server environment.

2.1 Enable Hardening & Prevention Options

To enable and disable security hardening and prevention in the Sucuri Security plugin:

  1. Log into your WordPress administrator dashboard.
  2. From the left-side menu, click Sucuri Security, and then Hardening & Prevention.
  3. Click the Apply Hardening button to any of the security options described on the right-hand side.
Hardening & Prevention Options Overview

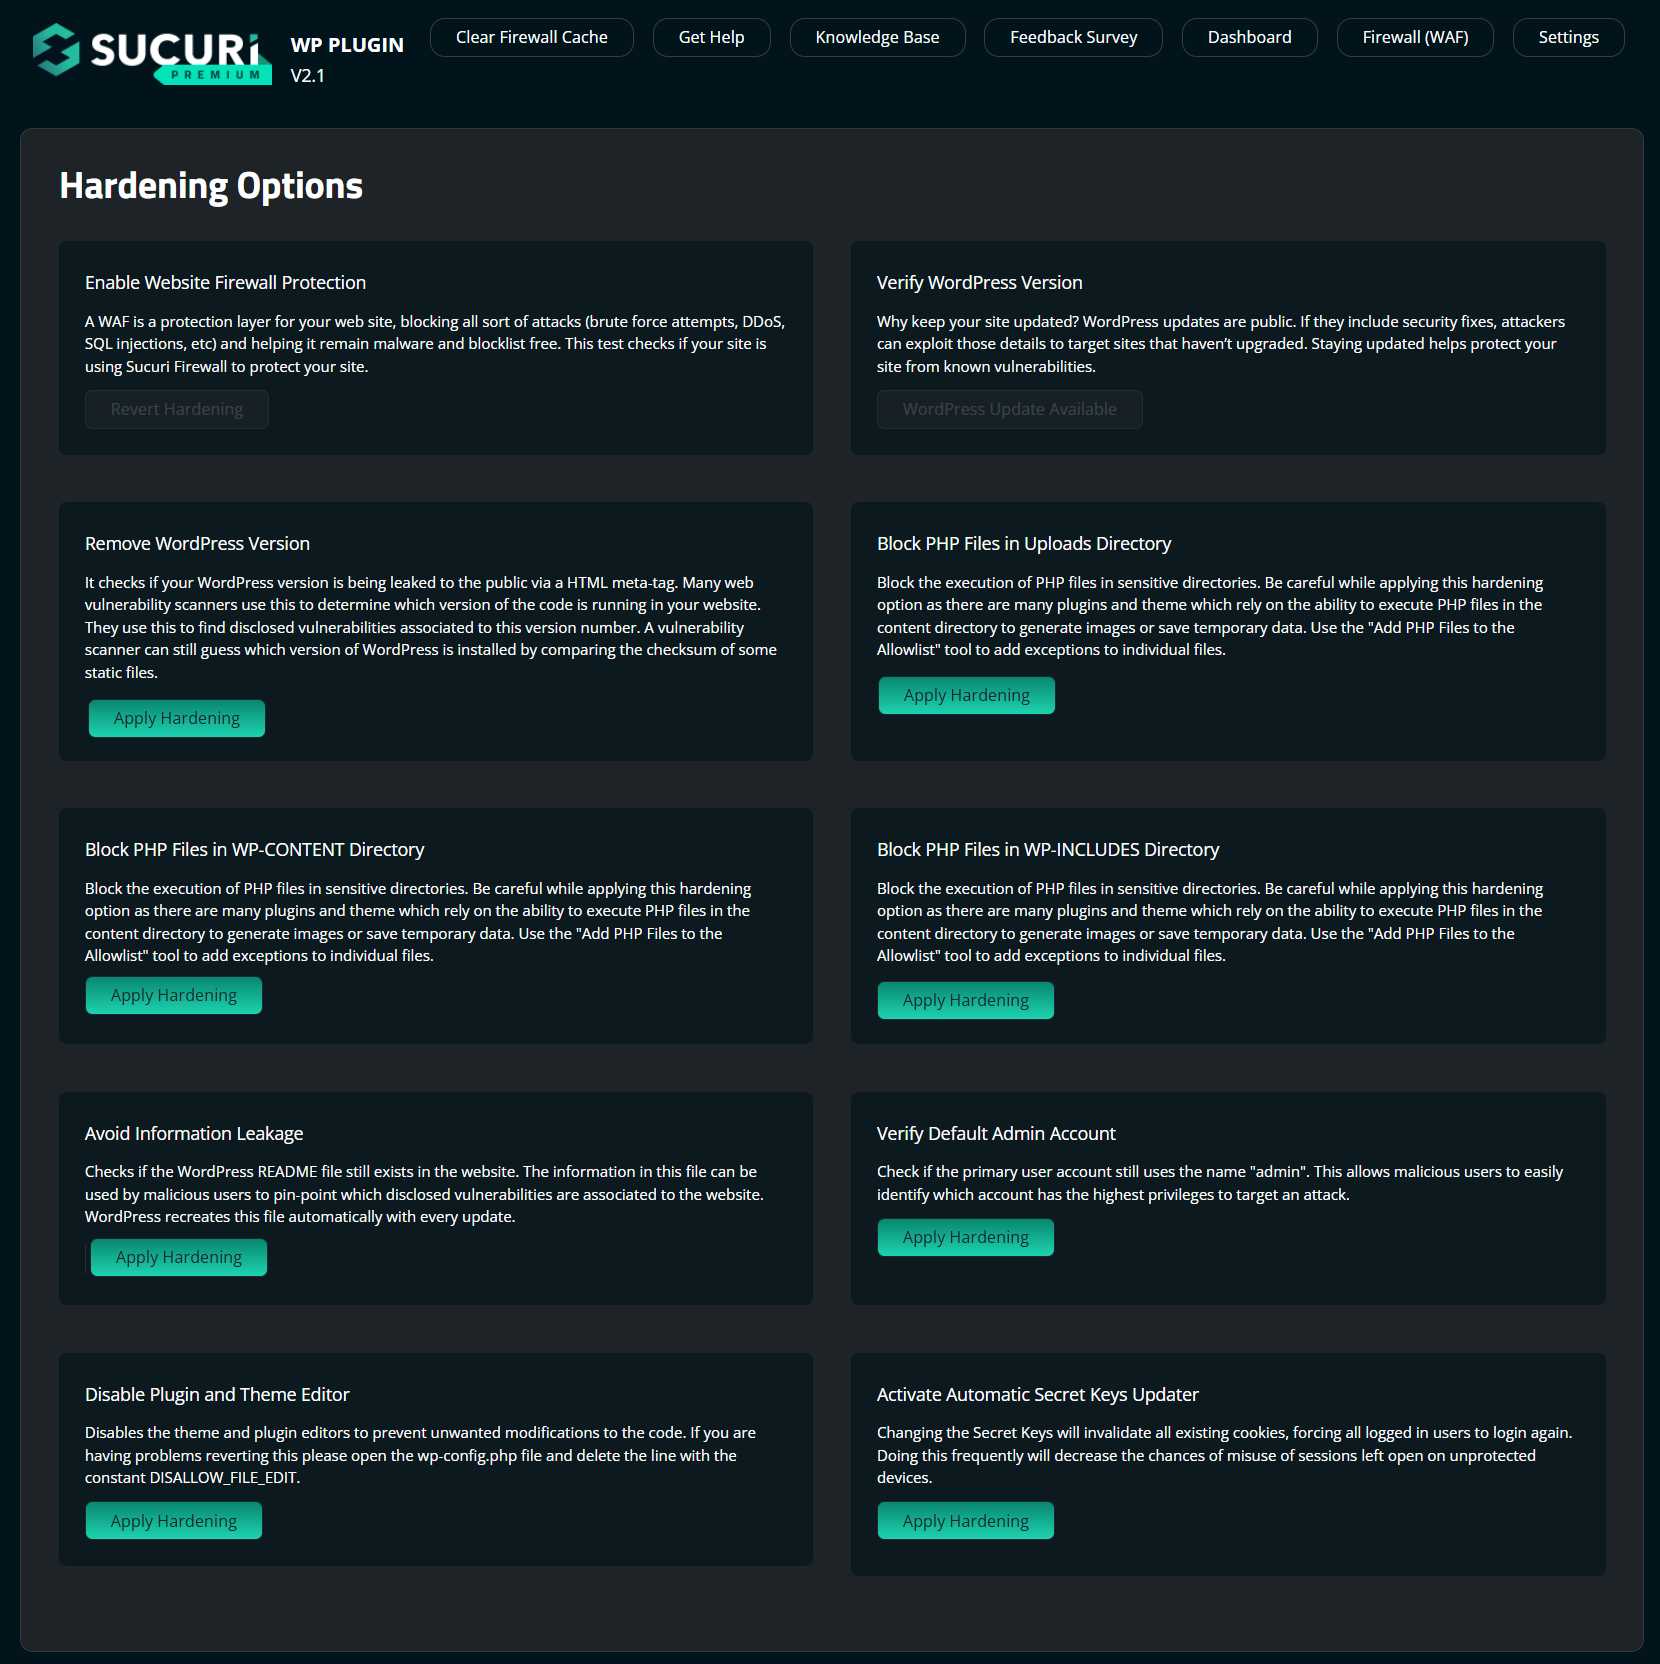
Hardening & Prevention options:

  • Enable Website Firewall Protection:  A WAF is a protection layer for your web site, blocking all sort of attacks (brute force attempts, DDoS, SQL injections, etc) and helping it remain malware and blocklist free. This test checks if your site is using Sucuri Firewall to protect your site.
  • Verify WordPress Version:   Why keep your site updated? WordPress updates are public. If they include security fixes, attackers can exploit those details to target sites that haven’t upgraded. Staying updated helps protect your site from known vulnerabilities.
  • Remove WordPress Version:  It checks if your WordPress version is being leaked to the public via a HTML meta-tag. Many web vulnerability scanners use this to determine which version of the code is running in your website. They use this to find disclosed vulnerabilities associated to this version number. A vulnerability scanner can still guess which version of WordPress is installed by comparing the checksum of some static files.
  • Block PHP Files in Uploads Directory:  Block the execution of PHP files in sensitive directories. Be careful while applying this hardening option as there are many plugins and theme which rely on the ability to execute PHP files in the content directory to generate images or save temporary data. Use the “Add PHP Files to the Allowlist” tool to add exceptions to individual files.
  • Block PHP Files in WP-CONTENT Directory:  Block the execution of PHP files in sensitive directories. Be careful while applying this hardening option as there are many plugins and theme which rely on the ability to execute PHP files in the content directory to generate images or save temporary data. Use the “Add PHP Files to the Allowlist” tool to add exceptions to individual files.
  • Block PHP Files in WP-INCLUDES Directory:  Block the execution of PHP files in sensitive directories. Be careful while applying this hardening option as there are many plugins and theme which rely on the ability to execute PHP files in the content directory to generate images or save temporary data. Use the “Add PHP Files to the Allowlist” tool to add exceptions to individual files.
  • Avoid Information Leakage:  Checks if the WordPress README file still exists in the website. The information in this file can be used by malicious users to pin-point which disclosed vulnerabilities are associated to the website. WordPress recreates this file automatically with every update.
  • Verify Default Admin Account:  Check if the primary user account still uses the name “admin”. This allows malicious users to easily identify which account has the highest privileges to target an attack.
  • Disable Plugin and Theme Editor:  Disables the theme and plugin editors to prevent unwanted modifications to the code. If you are having problems reverting this please open the wp-config.php file and delete the line with the constant DISALLOW_FILE_EDIT.
  • Activate Automatic Secret Keys Updater:  Changing the Secret Keys will invalidate all existing cookies, forcing all logged in users to login again. Doing this frequently will decrease the chances of misuse of sessions left open on unprotected devices.

Note

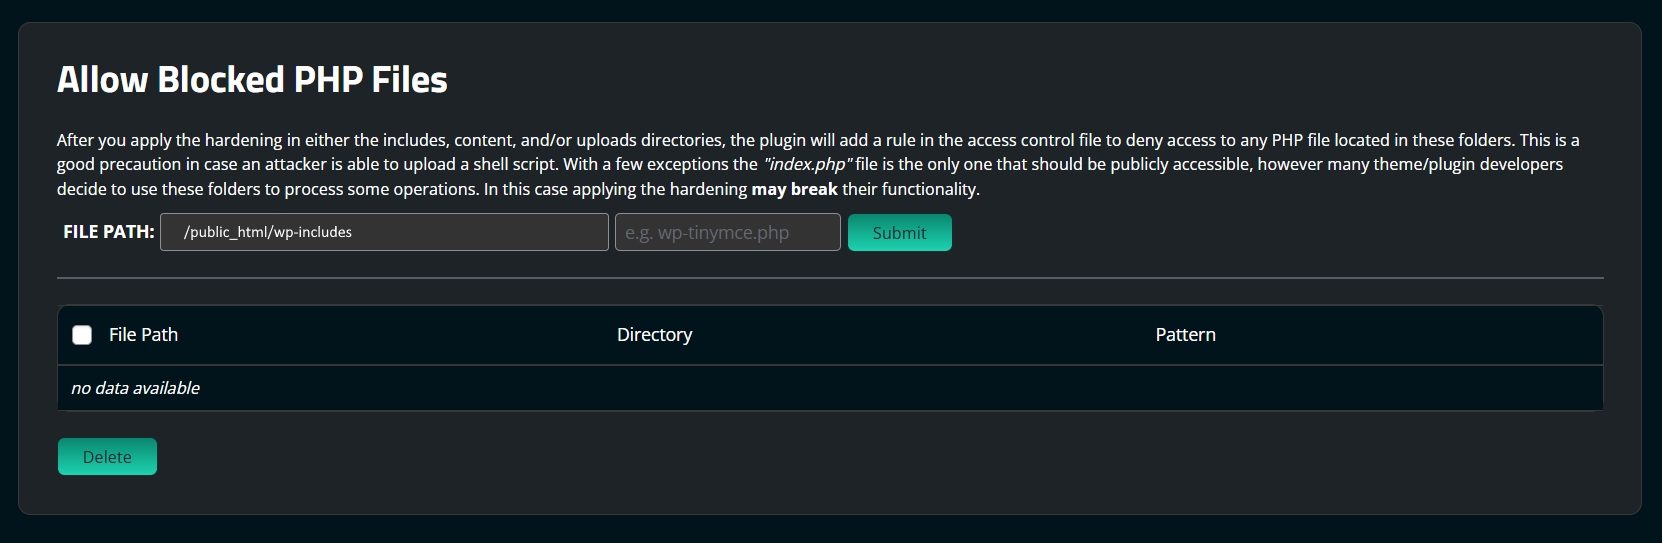
You will also find the option to Allow Blocked PHP Files that have been blocked by scrolling down the page. After you apply the hardening in either the includes, content, and/or upload directories, the plugin will add a rule in the access control file to deny access to any PHP file located in these folders.


This is a good precaution in case an attacker is able to upload a PHP script. With a few exceptions, the “index.php” is the only one that should be publicly accessible. However, many theme/plugin developers decide to use these folders to process some operations. In this case, applying the hardening may break functionality, so allowlisting can be used to allow only these files.

2.2 Revert Hardening

At some point, you may need to revert hardening settings to make changes to your site. Hardening should be disabled at this time, then re-enabled once you are done.

To revert the WordPress security plugin hardening features:

  1. Log into your WordPress administrator dashboard.
  2. From the left-side menu, click Sucuri Security, and then Hardening & Prevention.
  3. Identify the option to revert and click the Revert Hardening button.

Revert hardening options:

  1. Enable Website Firewall Protection
  2. Remove WordPress Version
  3. Block PHP Files in Uploads Directory
  4. Block PHP Files in WP-CONTENT Directory
  5. Block PHP Files in WP-INCLUDES Directory
  6. Avoid Information Leakage
  7. Verify Default Admin Account
  8. Disable Plugin and Theme Editor
  9. Activate Automatic Secret Keys Updater
Allow Blocked PHP Files Overview

STEP 3

Email Alerts

By default, our plugin will send email alerts to the primary administrator’s account email address, the same account created during the installation of WordPress in your web server.

You can add more people to the list and they will receive a copy of the same security alerts.  You will receive daily scan reports automatically to the default email used to set up your Sucuri Security plugin.  Or you can choose to manually push a scan at any time.

3.1 Custom Email Alerts

You can customize the email and recipients for any alerts generated by the plugin.

To modify the Sucuri Security plugin email alerts:

  1. Log into your WordPress administrator dashboard.
  2. From the left-side menu, click Sucuri Security, then Settings.
  3. Once on the Settings screen, click the Alerts tab on the menu bar.
  4. Change the options per what’s described in the next section.
Alert Recipient Overview

Note

Even if you disable the email alerts, the plugin will keep monitoring the events triggered by WordPress and the information will be sent to our API service which powers the “Audit Logs” panel located in the plugin’s dashboard page.

3.2 Security Alert Options

You can manage the types of alerts you receive from our plugin and allow trusted IP addresses so they do not generate alerts.

  • Alerts Recipients:  By default, the plugin will send the email alerts to the primary admin account, the same account created during the installation of WordPress in your web server. You can add more people to the list, they will receive a copy of the same security alerts.
  • Trusted IP Addresses:  If you are working in a LAN (Local Area Network) you may want to include the IP addresses of all the nodes in the subnet, this will force the plugin to stop sending email alerts about actions executed from trusted IP addresses. Use the CIDR (Classless Inter Domain Routing) format to specify ranges of IP addresses (only 8, 16, and 24).
  • Alert Subject:  Format of the subject for the email alerts, by default the plugin will use the website name and the event identifier that is being reported, you can use this panel to include the IP address of the user that triggered the event and some additional data. You can create filters in your email client creating a custom email subject using the pseudo-tags shown.
  • Alerts Per Hour:  Configure the maximum number of email alerts per hour. If the number is exceeded and the plugin detects more events during the same hour, it will still log the events into the audit logs but will not send the email alerts. Be careful with this as you will miss important information.
  • Post-type Alerts:  This is a list of registered Post Types. You will receive an email alert when a custom page or post associated to any of these types is created or updated. If you don’t want to receive one or more of these alerts, feel free to uncheck the boxes in the table below. If you are receiving alerts for post types that are not listed in this table, it may be because there is an add-on that that is generating a custom post-type on runtime, you will have to find out by yourself what is the unique ID of that post-type and type it in the form below. The plugin will do its best to ignore these alerts as long as the unique ID is valid.

Note

The Sucuri Security plugin does not monitor every event triggered by WordPress, only the ones that we consider relevant for security – like possible indicators of compromise. If you notice any events that were not initiated by you or your team, it may prompt further investigation. Additionally, we monitor global setting changes and core WordPress updates.

3.3 Failed Login Alerts

If you are receiving many emails about “Failed Logins”, your website is likely being targeted in a Brute Force Attack.

  1. Log into your WordPress administrator dashboard.
  2. From the left-side menu, click Sucuri Security, and then Last Logins.
  3. Once on the Last Logins screen, click the Failed Logins tab on the top right.
  4. Install our website application firewall to block unauthorized IP addresses from accessing your WordPress login page.

The plugin alerts you to a Brute Force Attack after it detects more than 30 failed login attempts within an hour. This can also be modified following the above steps, under the Password Guessing Brute Force Attack section.
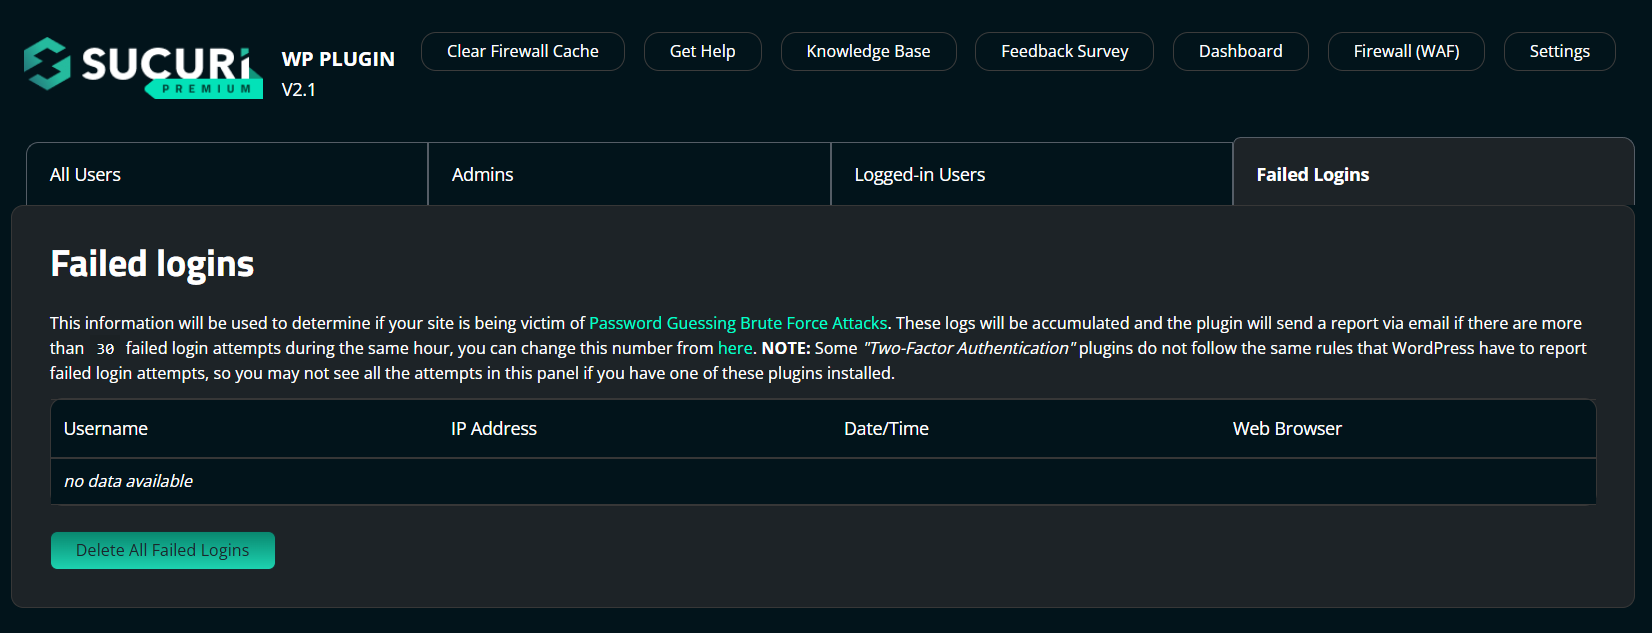
Failed Logins Overview

Note

It is recommended to disable the email alerts for failed logins and enable the alerts for brute force attacks. This will force the Sucuri WordPress plugin to collect all of the failures per hour and send a single email notification.

STEP 4

Malware Scanning

The malware scanner is one of the most popular tools integrated into the Sucuri WordPress security plugin.

This free tool, powered by Sucuri’s SiteCheck, scans your website for:

  • Malware
  • Blocklist Status
  • Website Errors
  • Out-of-Date Software
  • Security Anomalies

4.1 Malware Detection

SiteCheck is a free website security scanner. Remote scanners have limited access and results are not guaranteed. It finds malicious code that is visible in the external source code of your site. Your site could be hosting malware on the server that doesn’t show up on the frontend of the site. For a full server-side scan, contact our team.

To change malware detection settings in the Sucuri plugin:

  1. Log into your WordPress administrator dashboard.
  2. From the left-side menu, click Sucuri Security, then Settings.
  3. Once on the Settings screen, click the Scanner tab on the menu bar.
  4. If this is your first time using this tool, it is recommended you go through all the available settings:
  • Scheduled Tasks:  These are rules registered in your database by a plugin, theme, or the base system itself; they are used to automatically execute actions defined in the code every certain amount of time. A good use of these rules is to generate backup files of your site, execute a security scanner, or remove unused elements like drafts. M are rules registered in your database by a plugin, theme, or the base system itself; they are used to automatically execute actions defined in the code every certain amount of time. A good use of these rules is to generate backup files of your site, execute a security scanner, or remove unused elements like drafts.  NOTE:  Scheduled tasks can be re-installed by any plugin/theme automatically.
  • WordPress Integrity Diff Utility:  If your server allows the execution of system commands, you can configure the plugin to use the Unix Diff Utility to compare the actual content of the file installed in the website and the original file provided by WordPress. This will show the differences between both files and then you can act upon the information provided.
  • WordPress Integrity (False Positives):  Since the scanner doesn’t read the files during the execution of the integrity check, it is possible to find false positives. Files listed here have been marked as false positives and will be ignored by the scanner in subsequent scans.
  • Ignore Files and Folders During the Scans:  Use this tool to select the files and/or folders that are too heavy for the scanner to process. These are usually folders with images, media files like videos and audios, backups and — in general — anything that is not code-related. Ignoring these files or folders will reduce the memory consumption of the PHP script.
Scheduled Tasks Overview

STEP 5

Core Integrity Check

The Sucuri WordPress plugin comes with tools that check the integrity of the core WordPress files – PHP, JavaScript, CSS – and other files that come with your original WordPress version.

Attackers modify core files to add backdoors, which are fragments of code that allow them to bypass the security measures. Removing all backdoors from an infected site is crucial to avoid reinfection.

Identifying modified WordPress core files can alert you to backdoors and other indicators of compromise.

5.1 Automatic Integrity Checks

The Sucuri plugin automatically checks your WordPress files and alerts you if any files have been added, modified, or removed.

The integrity tool uses an API maintained by the WordPress organization to determine which files in the installation were added, removed or modified. The API returns a list of files with their respective checksums. This checksums can be used to guarantee that the installation is not corrupt.

If you are receiving a notification from the integrity check, follow the steps below to deal with added, removed, or modified files.

5.2 Added Files

When a file is marked as added, it means that it was not found in the official WordPress archives – at least not for the version number detected in your current website.

For example, if your site has a file named wp-protect.php in the document root and the official WordPress repository does not include this file, a hacker may have added it.

However, you may wish to upload files for legitimate reasons. If this is so, the file may not be malicious but the plugin does not know this. If you trust the file then you can force the plugin to ignore them in future scans by marking them as fixed.

For suspicious files that were added, you can choose to delete them. Delete any file if you do not trust they are safe.

5.3 Deleted Files

When a file is marked as deleted, it means that you are missing a core WordPress file.

You will not see this frequently because when a file is deleted from the core directories, the site generally goes down. There are some exceptions, like the xmlrpc.php file, which is used by WordPress to allow users and services to interact with the site through RPC.

From the plugin, you can choose restore and the file will be replaced from the official WordPress repository.

The plugin provides an option to do this automatically. If you need additional assistance or would like to learn more about why backups can save your website, visit our Website Backups page.

5.4 Modified Files

When a file is marked as modified, it means that the core file on your WordPress site does not match the official repository.

You should never modify core files because this causes difficulties with the upgrades and maintainability of the code.

If you find modified files, you should choose the restore option. The corrupt version will automatically be replaced using a copy from the official WordPress repository.

5.5 Dev Sites

If you are using a custom version of WordPress (like the development version of the code), you can point the integrity tool to a GitHub repository to check your files against it.

To run an integrity check against a custom repository:

  1. Log into your WordPress administrator dashboard.
  2. From the left-side menu, click Sucuri Security, and then Settings.
  3. Once on the Settings screen, click the API Communication tab. 
  4. Scroll down to the WordPress Checksums API.
  5. Type in the URL of the repository to run the checksum and click Submit.

STEP 6

Post-Hack

If your website is hacked, you need to take immediate action to protect your visitors and prevent further damage.

This section of the plugin offers measures for when your site has been compromised. More information is available on the steps to take when your site has been compromised on our free How to Clean a Hacked WordPress Guide.

Here is an overview of the post-hack features of the WordPress security plugin:

  1. Update Secret Keys:  The secret or security keys are a list of constants added to your site to ensure better encryption of information stored in the user’s cookies. A secret key makes your site harder to hack by adding random elements to the password. You do not have to remember the keys, just write a random, complicated, and long string in the wp-config.php file. You can change these keys at any point in time. Changing them will invalidate all existing cookies, forcing all logged in users to login again.
  2. Reset User Password:  Select users from the list in order to change their passwords, terminate their sessions and email them a password reset link. Please be aware that the plugin will change the passwords before sending the emails, meaning that if your web server is unable to send emails, your users will be locked out of the site.
  3. Reset Installed Plugins:  In case you suspect having an infection in your site, or after you got rid of a malicious code, it’s recommended to reinstall all the plugins installed in your site, including the ones you are not using. Notice that premium plugins will not be automatically reinstalled to prevent backward compatibility issues and problems with licenses.
  4. Available Plugins and Themes Updates:  WordPress has a big user base in the public Internet, which brings interest to attackers to find vulnerabilities in the code, 3rd-party extensions, and themes that other companies develop. You should keep every piece of code installed in your website updated to prevent attacks as soon as disclosed vulnerabilities are patched.

Below, you can observe the step-by-step for each one of Post-Hack settings.

6.1 Update Security Keys

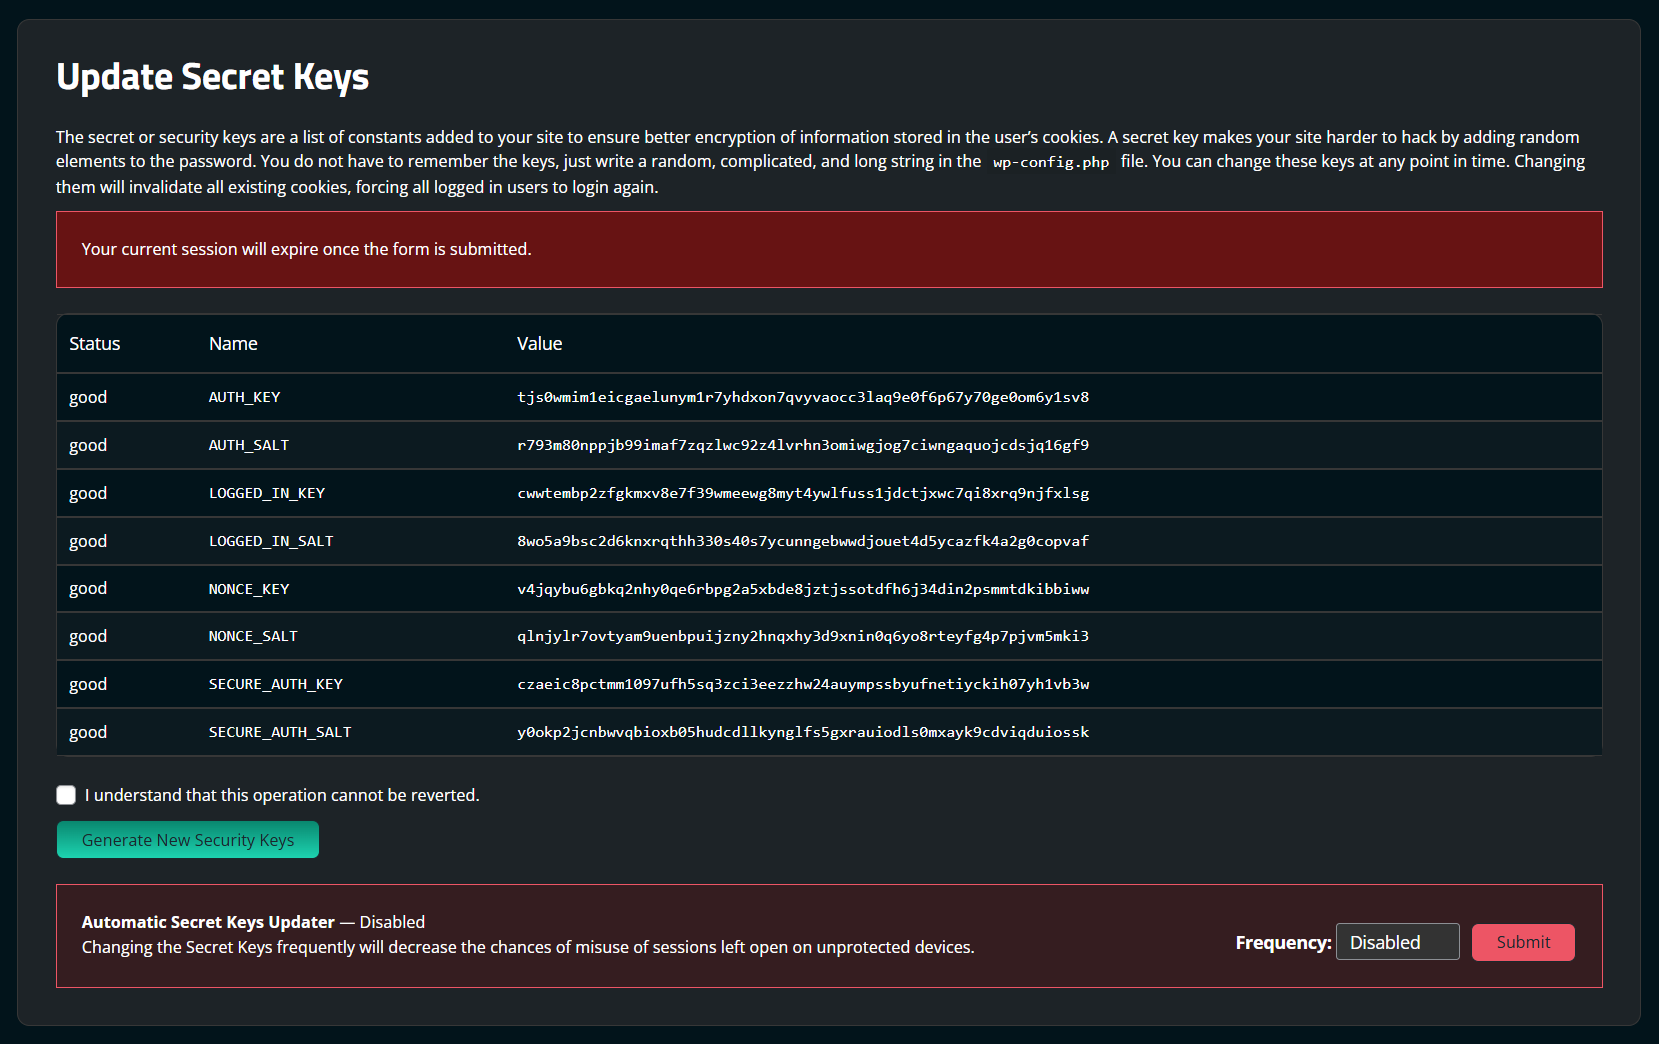
WordPress uses browser cookies to keep user sessions active for two weeks. If an attacker has a session cookie, they will retain access to the website even after a password is reset.

To fix this, we recommend forcing active users off by resetting WordPress secret keys.

To generate new secret keys using the Sucuri plugin:

  • Log into your WordPress administrator dashboard.
  • From the left-side menu, click Sucuri Security, and then Post-Hack Actions
  • Once on the Post-Hack Actions screen, click the Generate New Security Keys button–  this will force all users out of the WordPress dashboard.
Update Secret Keys Overview

6.2 Reset User Passwords

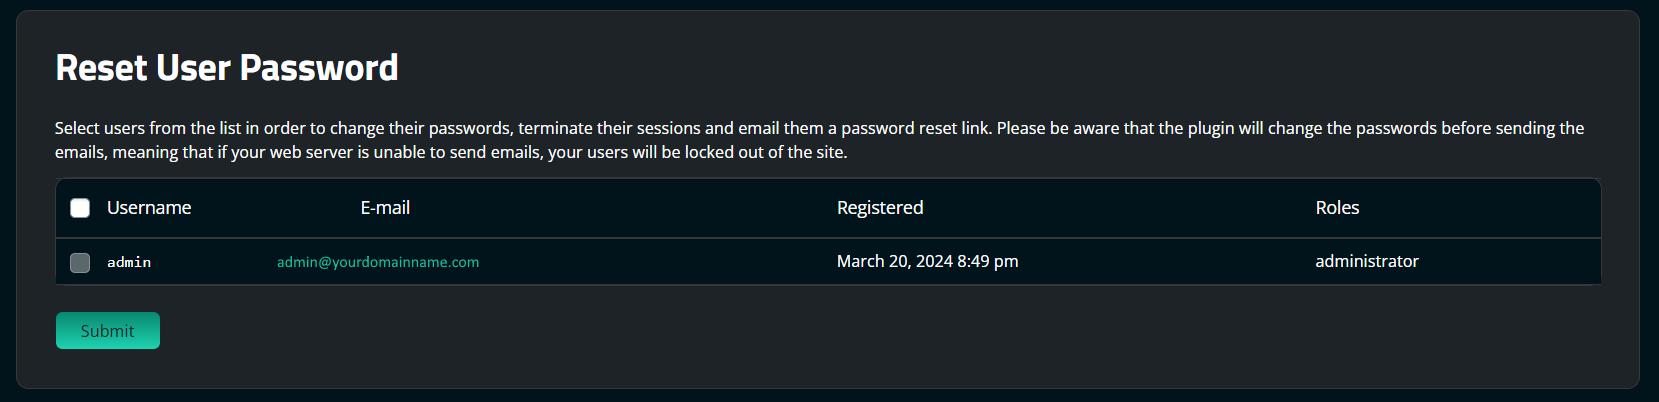
It is critical that you change passwords for all access points. This includes WordPress user accounts, FTP/SFTP, SSH, cPanel, and your database.

To reset user passwords using the Sucuri plugin:

  1. Log into your WordPress administrator dashboard.
  2. From the left-side menu, click Sucuri Security, and then Post-Hack Actions.
  3. Once on the Post-Hack Actions screen, scroll down to find the Reset User Password feature.
  4. The user will receive an email with a strong temporary password.
Reset Password Overview

You should reduce the number of admin accounts for all of your systems. Practice the principle of least privileged. Only give people the access they require to do the job they need.

6.3 Reset Installed Plugins

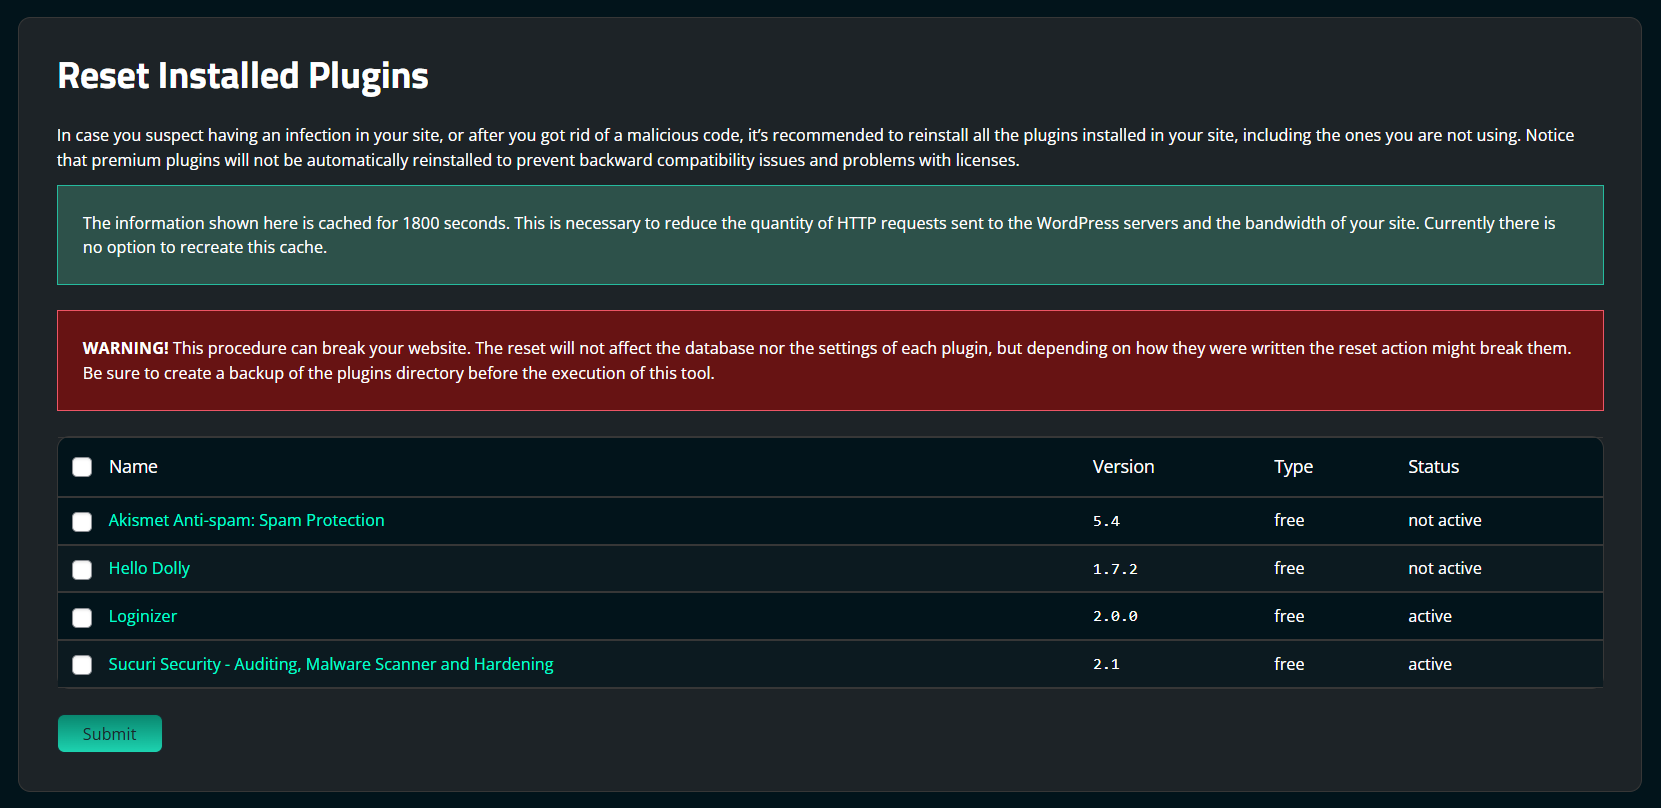
After you clean all malicious code from your site, we recommend reinstalling your plugins in case one of them was infected as well. We also highly recommend that you delete any plugins you are not using.

To reset WordPress plugins in the Sucuri security plugin:

  1. Log into your WordPress administrator dashboard.
  2. From the left-side menu, click Sucuri Security, and then Post-Hack Actions.
  3. Once on the Post-Hack Actions screen, scroll down to find the Reset Installed Plugins.
  4. Select the applicable and then click the Submit button.
Reset Installed Plugins Overview

Note

Premium plugins will not be reinstalled to prevent backward compatibility issues and problems with licenses.

6.4 Available Plugin and Theme Updates

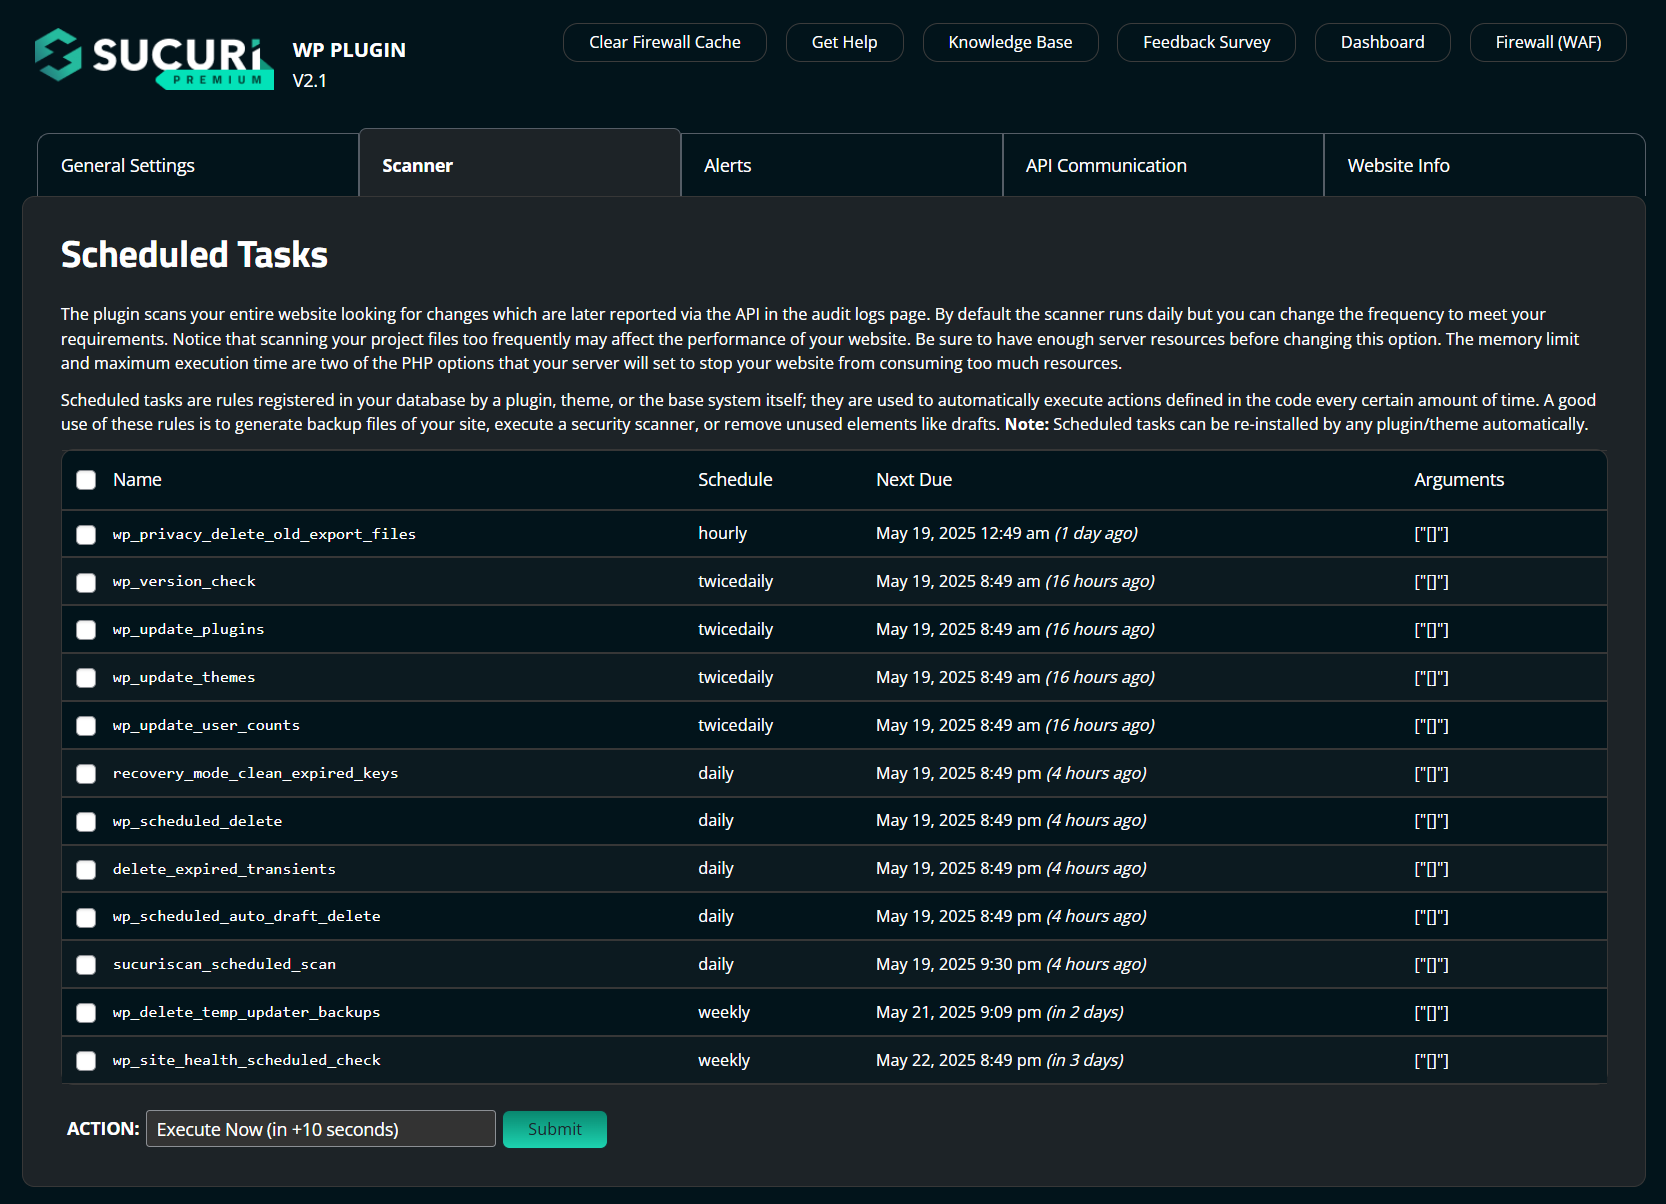
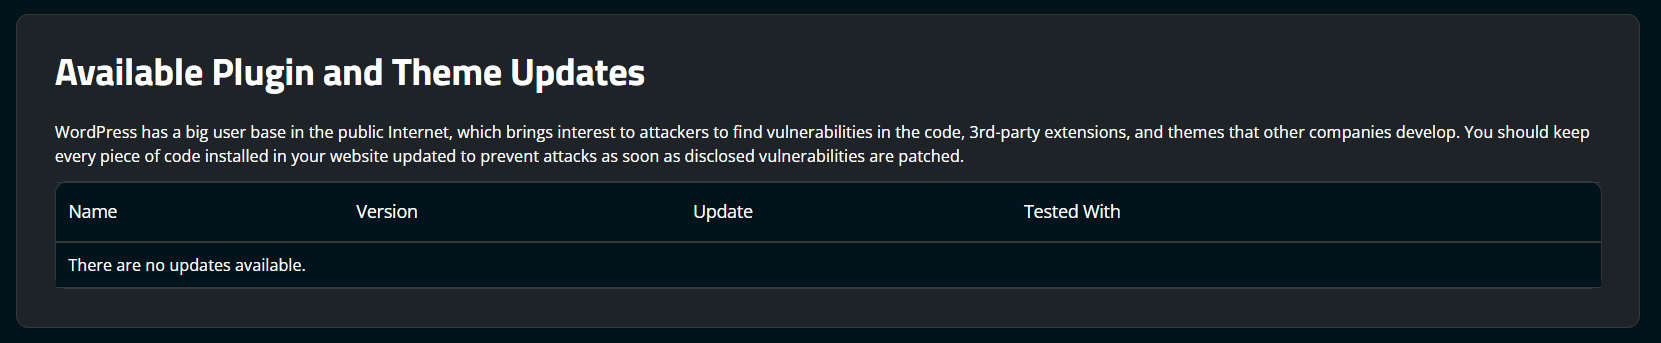
WordPress powers over 30% of all websites on the internet. This makes it an attractive target for attackers who scan the code for vulnerabilities. They also target popular plugins and themes.

You should keep every plugin and theme up to date to prevent attacks as soon as vulnerabilities are patched and made available via updates.

To update your plugins and themes:

  1. Log into your WordPress administrator dashboard.
  2. From the left-side menu, click Sucuri Security, and then Post-Hack Actions.
  3. Once on the Post-Hack Actions screen, scroll down to find the Available Available Plugin and Theme Updates.
  4. Select the applicable, and click Download, this will prompt a file download to your computer.
  5. Once the download is complete, you can manually upload them in:
  • Appearance > Themes > Add New > Upload Theme
  • Plugins > Add New > Upload Plugin
Available Plugin and Theme Updates Overview

STEP 7

Sucuri Firewall Integration

This section applies if you are a Sucuri customer who has activated the web application firewall.

7.1 Enable WAF Dashboard

You can connect the Sucuri Firewall to the WordPress plugin using the Firewall (WAF) option of the Sucuri plugin.

To connect your Sucuri account to the plugin:

  • Log into your WordPress admin.
  • Under the Sucuri Plugin, go to Dashboard.
  • Click the Firewall (WAF) button on the upper right side of the screen.
  • Find the Sucuri Security plugin on the sidebar and go to Firewall (WAF).
  • Paste your API Key and then click Save.

7.2 Website Firewall Benefits

The number of vulnerabilities exploited by attackers grows everyday. Trying to keep up is challenging for administrators. Website Firewalls were invented to provide a perimeter defense system surrounding your website.

Benefits to using a website firewall:

  • Prevent a Future Hack – By detecting and stopping known hacking methods and behaviors, a website firewall keeps your site protected against infection in the first place.
  • Virtual Security Update – Hackers quickly exploit vulnerabilities in plugins and themes, and unknown ones are always emerging (called zero-days). A good website firewall will patch your holes in your website software even if you haven’t applied security updates.
  • Block Brute Force Attack – A website firewall should stop anyone from accessing your wp-admin or wp-login page if they aren’t supposed to be there, making sure they can’t use brute force automation to guess your password.
  • Mitigate DDoS Attack – Distributed Denial of Service attacks attempt to overload your server or application resources. A website firewall detects and blocks all types of DDoS attacks, ensuring your site is available if you are attacked by a high volume of fake visits.
  • Performance Optimization – Most WAFs will offer caching for faster global page speed. This keeps your visitors happy and is proven to lower bounce rates while improving website engagement, conversions, and search engine rankings.

We offer all of these features with the Sucuri Firewall.

If you need further help with the plugin, please submit a ticket in the Support Forum.

Defend against hackers with our web application firewall.

Sucuri Resource Library

Say on top emerging website security threats with our helpful guides, email, courses, and blog content.

Webinar

Learn how to identify issues if you suspect your WordPress site has been hacked.

Email Course

Join our email series as we offer actionable steps and basic security techniques for WordPress site owners.

Report

Based on our data, the three most commonly infected CMS platforms were WordPress, Joomla! and Magento.